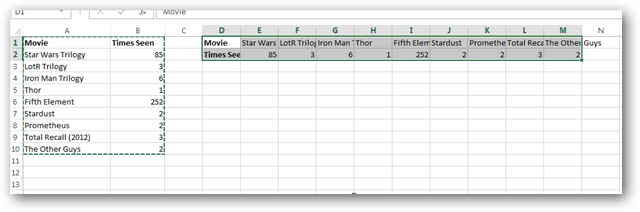
Convert Rows to Columns in Excel with Transpose
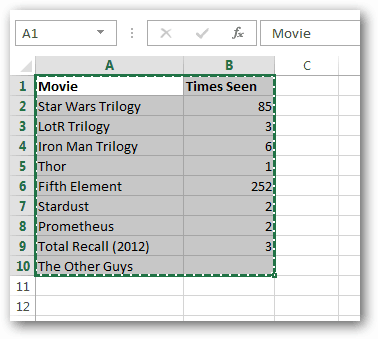
In Excel 2013 select the entire table that you want to convert to either column or row format.
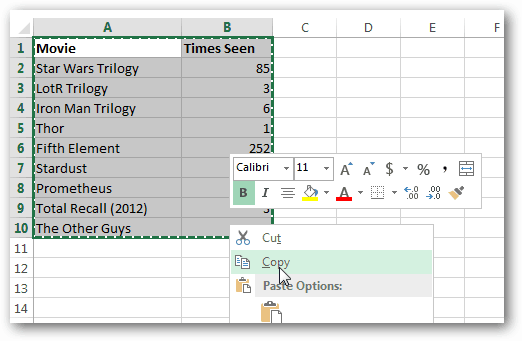
Now copy the table by right-clicking it and selecting Copy, or using the Ctrl + C keyboard shortcut. Note that “Cut” won’t work for this particular function.
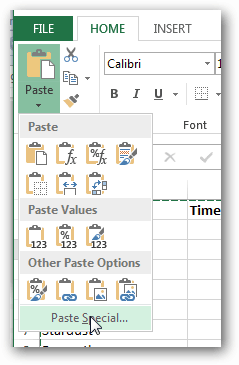
Now either from the right-click menu or the Home tab on the Ribbon, select Paste Special…
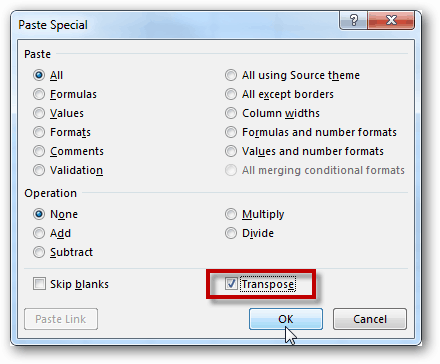
In the Paste Special box check the Transpose box and then click OK. If you see an error, you may need to select a box outside of the original table before attempting to Transpose again.
Your newly arranged table should appear in the spreadsheet, and that’s all there is to using the Transpose feature in Excel 2013.
Member #1 / 2045 / 1997 / 2140 into: Member #1 / 2045 Member #1 / 1997 Member #1 / 2140 Comment Name * Email *
Δ Save my name and email and send me emails as new comments are made to this post.


![]()
