Clear Windows 10 Search History
To clear your search history, head to Settings > Search > Permissions and History. Then scroll down and click the “Search history settings” link under the “My search history” section. Note that here you can turn off search history entirely – just toggle off the switch.
Next, your default browser will open to the Bing Search History page. Here click the View and delete search history button.
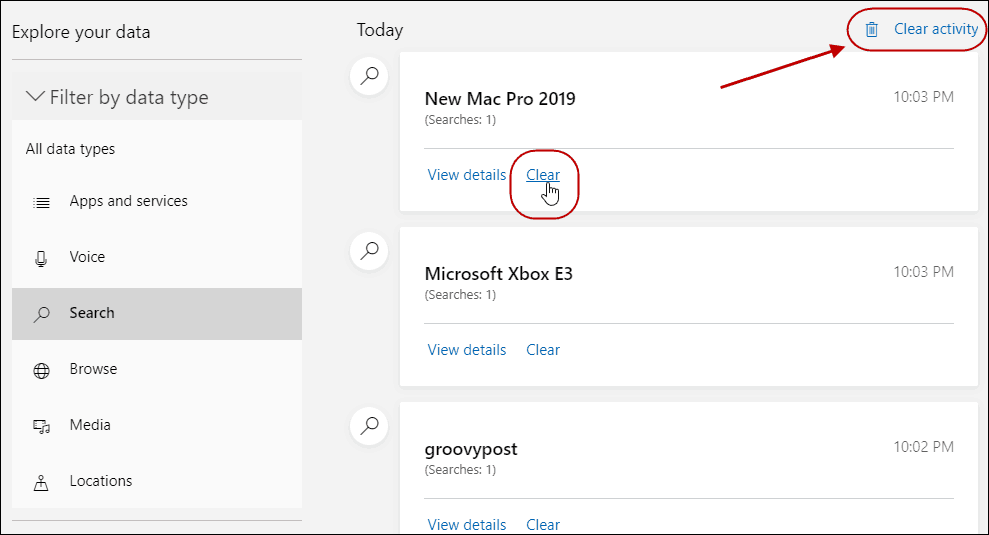
You’ll be prompted to sign in to your Microsoft account. That will send you to the Activity History section on your Privacy Dashboard. At the top, you’ll see a message from Microsoft CEO Satya Nadella. Scroll down to view a list of your search queries from Windows Search on Windows 10 and Bing searches. Here you can clear individual search queries by clicking the clear link next to the search item. Or, if you want to get rid of everything, click the Clear activity link at the top right.
Clear All Search History
If you clear it all, you’ll get a poignant message telling you how Bing won’t work as good. And Microsoft will have a hard time improving search. Make sure to click the “Clear” button at the right. The company obviously doesn’t want you to clear your searches. Also, while you’re here, you might want to go ahead, and clear other activities collected by Microsoft such as voice activity and location data.
Another thing to point out here is 1903 also includes an Enhanced Search Mode. It’s a feature designed to provide a better overall search experience. Once enabled, Windows will search for items across all folders and connected drives as well as the web. If you are running an earlier version of Windows 10, you can just go directly to your Privacy Dashboard and clear your activity. For more on that, read our article: Use the Microsoft Privacy Dashboard to Delete and Download Activity History.
![]()


