How To Modify An Existing Outlook Quick-Step
Step 1
In Outlook 2010, Click the Home ribbon and then click the small down arrow above the Quick Steps category. From the drop-down menu that appears, Select Manage Quick Steps…
Step 2
By default, there are only 5 Quick Steps in Outlook 2010. Select the one you would like to change, and then click the Edit button below the description.
Step 3.a – Customize the Quick Step
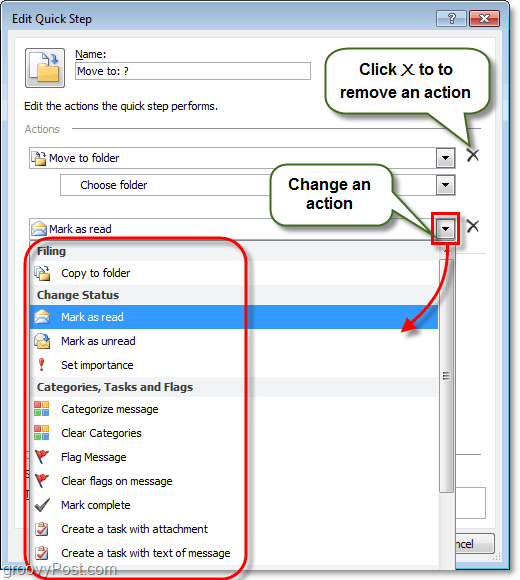
Regarding customization, there is a lot you can do, so we’ll break this into two different steps and screenshots. You can:
Click the X to remove Quick Step actions.Click the down arrow to change the action to something else completely.
Step 3.b – More Quick Step customization options
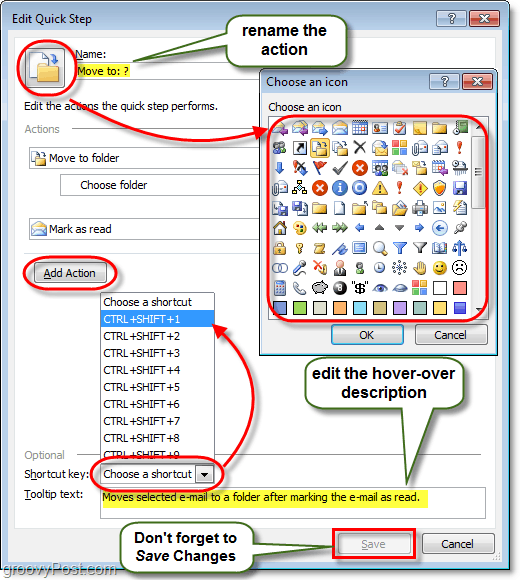
And even more, is available, you can also:
Click the Name box to change the name of the Quick Step.*Click Add Action to insert an extra action into the Quick Step.Click Choose a shortcut to assign a Shortcut key to this Quick Step. For example, if you assign CTRL+Shift+1 to this step, you can instantly perform the entire Quick Step by Pressing CTRL+Shift+1 at any time while using Outlook. This is handy because you won’t need to find the Home tab and Quick Step bar to use them.Type in the Tooltip text box to change the description.*Click the icon at the top-left to customize what Icon will display in your Quick-Steps list.
*This name and description will show up on the Quick Steps list in the Home Ribbon.
That covers everything you can do customizing Quick Steps; now, let’s look at making a brand new one.
How To Create A New Outlook 2010 Quick Step
Step 1
Microsoft gave us multiple different ways to get started and create a new Quick Step. If you opt for the template option, you can choose a preset Quick Step that has actions similar to the ones that come with Outlook 2010 out of the box. However, that is more like Customizing rather than starting a fresh one. For this how-to, we’ll use the Custom template, which is just a blank Quick Step.
Step 2
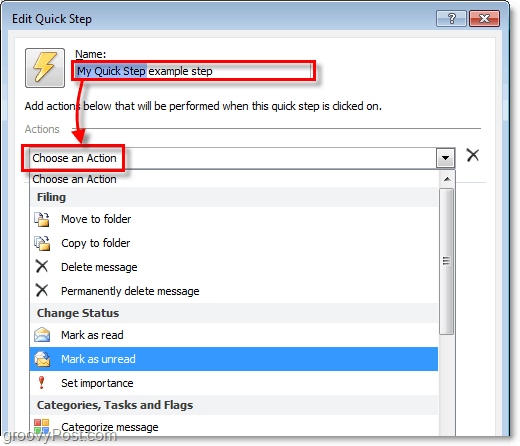
A new window should pop up called Edit Quick Step. The first thing to do is click the Name box and rename your Quick Step to something that makes sense with the actions it will be taking. Next, Choose your first action from the drop-down list.
Step 3
You’ve created your first action! Now Click Add Action to insert another one (if needed). Don’t forget to choose any locations or categories that you might want to use from the sub-lists (or leave them blank if you want to be asked which one every time you Apply this Quick Step). After you are done adding actions, Click the Icon to set it to whatever you like. Notice that the icon will change as you add action to match them best, so you might not even need to adjust it. When everything else is done, Click the Tooltip text box and type in a description that will appear when the mouse hovers over this Quick Step in the Home ribbon. Don’t forget; you can add Shortcut keys! Once you are done, click Finish to save your new Quick Step.
Done!
Your new Quick Step should now show up on the Quick Steps list under the Home ribbon.
Comment Name * Email *
Δ Save my name and email and send me emails as new comments are made to this post.


![]()
