With version history in Google Docs, Google Sheets, and Google Slides, you can keep track of all changes to your documents. You can see the history of versions, restore one if needed, give each a name for easier identification, and copy one to create a new document with it.
Open the Version History in Google Docs, Sheets, and Slides
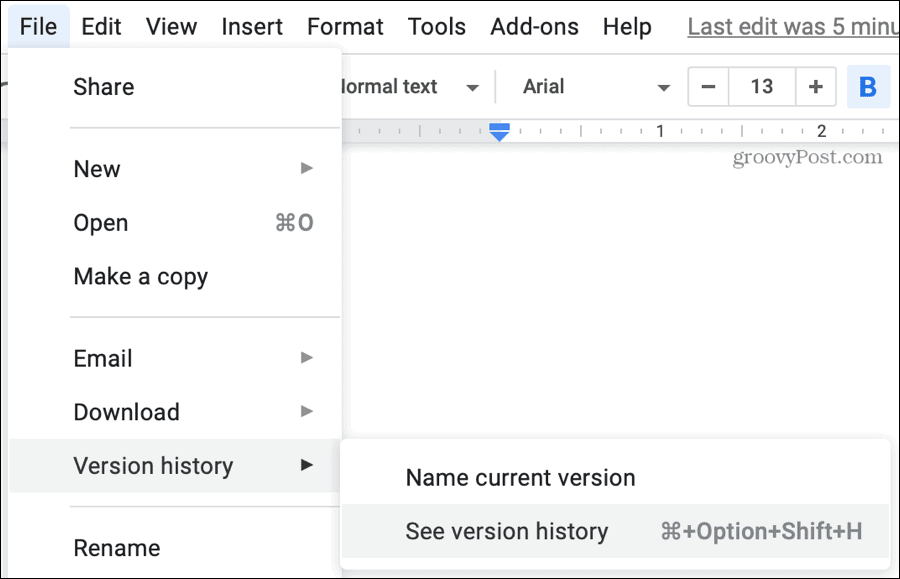
Seeing the version history for a document in any of these three Google apps takes only a few clicks.
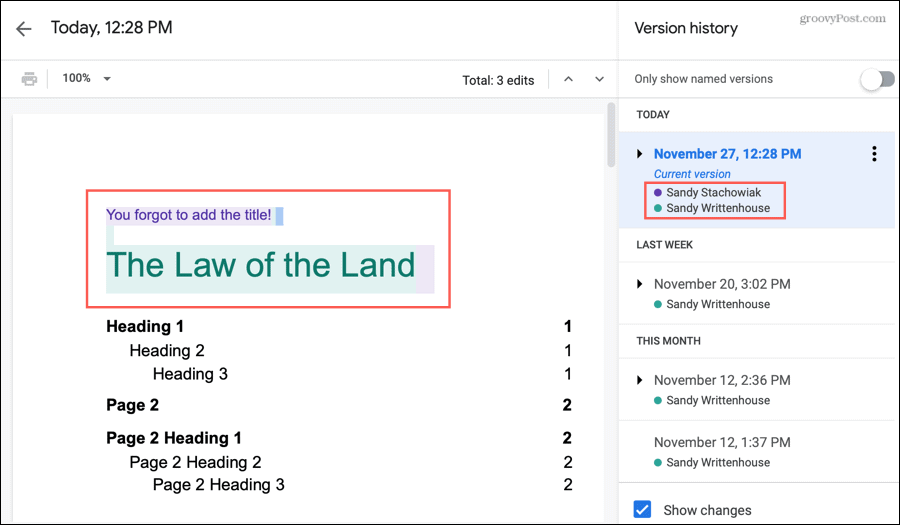
The version history screen will take over and includes a sidebar on the left. That sidebar contains each version of your document.
Viewing Changes
When you select a version, the document on the left side will show that iteration with the changes highlighted. Each colored highlight corresponds to the person who made the change. This is handy for shared documents in Google’s apps.
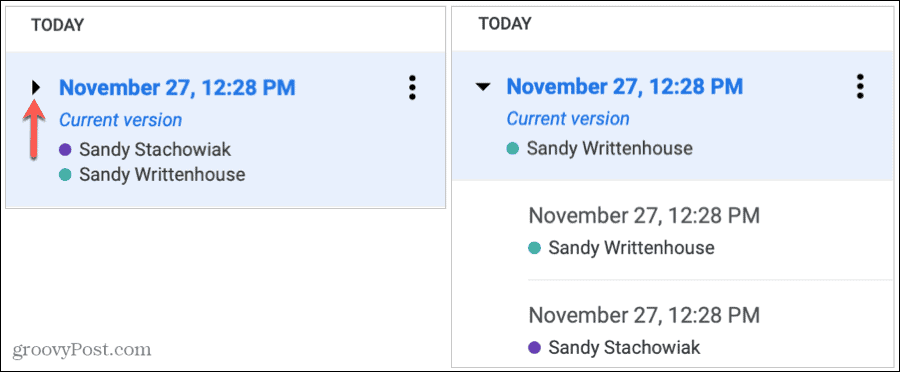
Below the version in the sidebar, you’ll see the name of the person who made changes and their highlight color. If you see two or more names below a version in the sidebar, click the arrow to the left of the name to expand it. You’ll then see each person’s individual changes as versions of their own.
If you don’t want to see the changes, turn off the toggle on the bottom of the sidebar for Show changes.
Restore a Previous Version
If you have a previous version of your document that you want to revert to, you can simply restore it. Select the version in the sidebar and then at the top of the document, click Restore this version. You’ll then need to confirm the action by clicking Restore.
That older version will then become the newest, current version of your document. It’s important to remember that when you restore an older version, any changes you made to another version since that one was saved, will not appear in your current version.
Assign Version Names
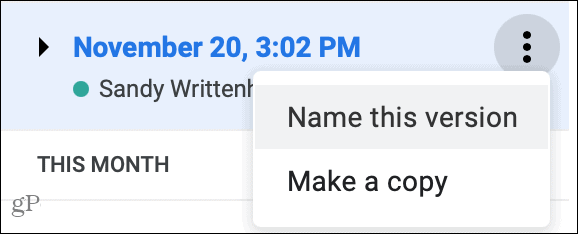
By default, each version of a document is named with the date and time. As you know, all documents you work on in Google Docs, Sheets, and Slides are automatically saved. So this is the date and time stamp you’ll see. To change the name either click the date and time to highlight the text or click More actions (three dots) to the right of the name and pick Name this version. Enter the new name and hit your Return or Enter key.
When you have names for your versions, you can choose to see only those in your version history. At the top of the sidebar enable the toggle for Only show named versions. This is a good way to see only those versions you feel are important. You’ll also see the “current version” that you’re working on even if you haven’t named it yet.
Time-Saving Tip: You can quickly name your current version without opening version history. Click File > Version History > Name current version from the menu.
Copy a Document Version
Maybe one of the document versions spawned an idea for a document of its own. You can easily copy a single version to create a new document. In the sidebar, select the version and then follow these steps.
If you save the copy to Google Drive, the new one will pop right open in a new window for you to work with it as its own document. Alternatively, you can navigate to where you saved the copy and open it from there. And the version from which you copied it will stay in the version history as a reference.
Use Your Google Document Version History
Version history in Google Docs, Sheets, and Slides isn’t just convenient for shared documents but can be useful for those you work on solo. You may make any changes that you decide are unnecessary and want to restore a previous version. Or you might want to go back and copy an old version for a new article, essay, or book chapter. If you’re new to Google Docs and want to explore more features like this, take a look at our guide for getting started with Google Docs.
![]()


